Global IT IP KVM – User Access Instructions
1. Open Internet Explorer, IE is required to be used for the IP KVM software.
2. Enter the IP KVM URL provided to you by the Global IT support team.
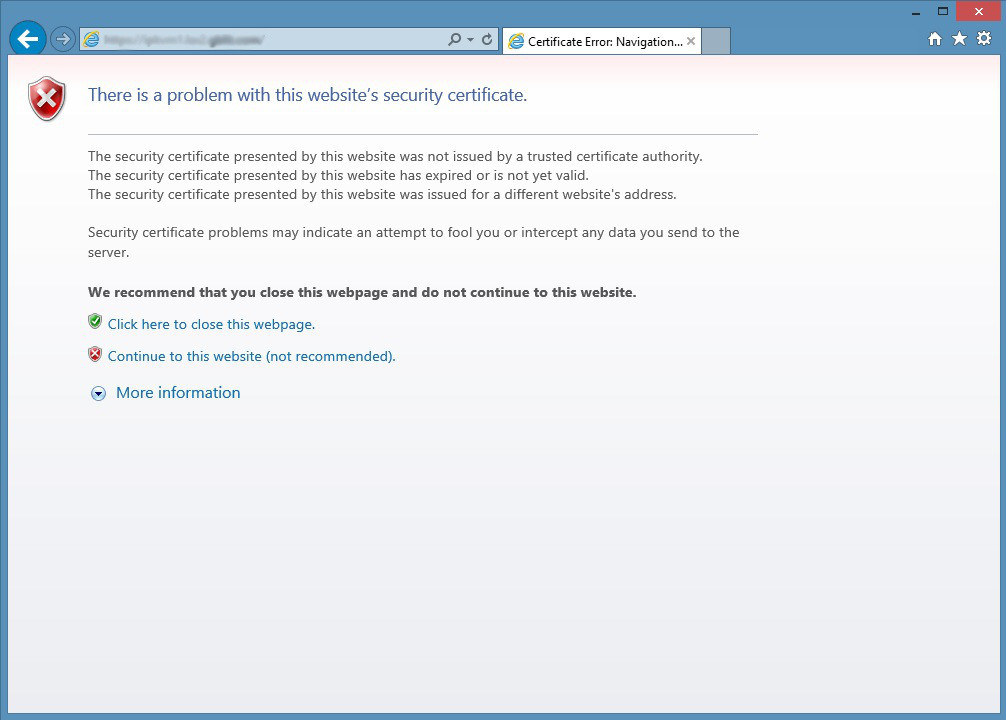
3. Click on “Continue to this website …” Twice
4. Click on “Continue” on “Security Warning” pop-up window
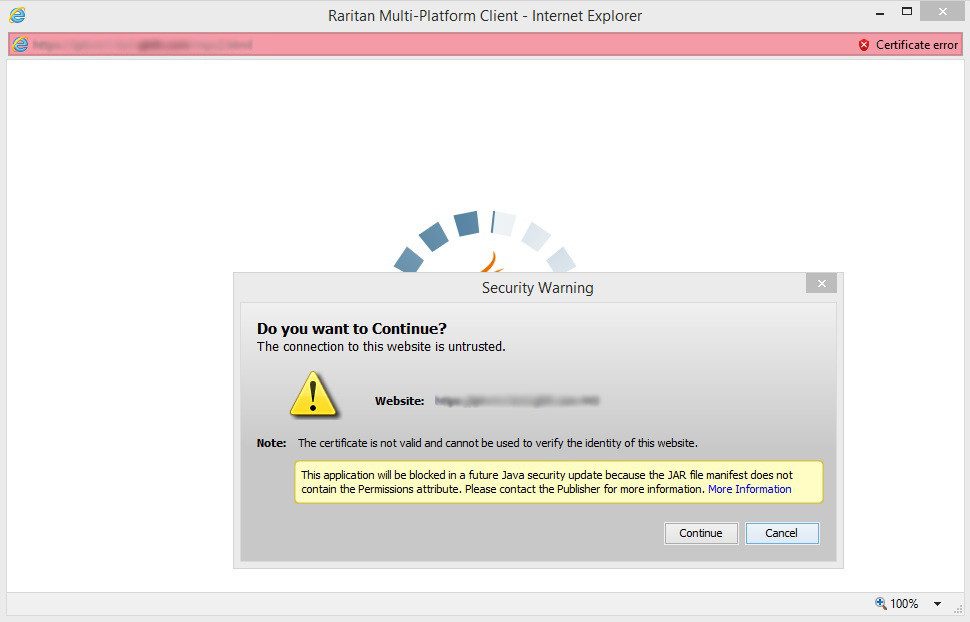
5. Check box next to “I accept the risk …” and click on “Run”

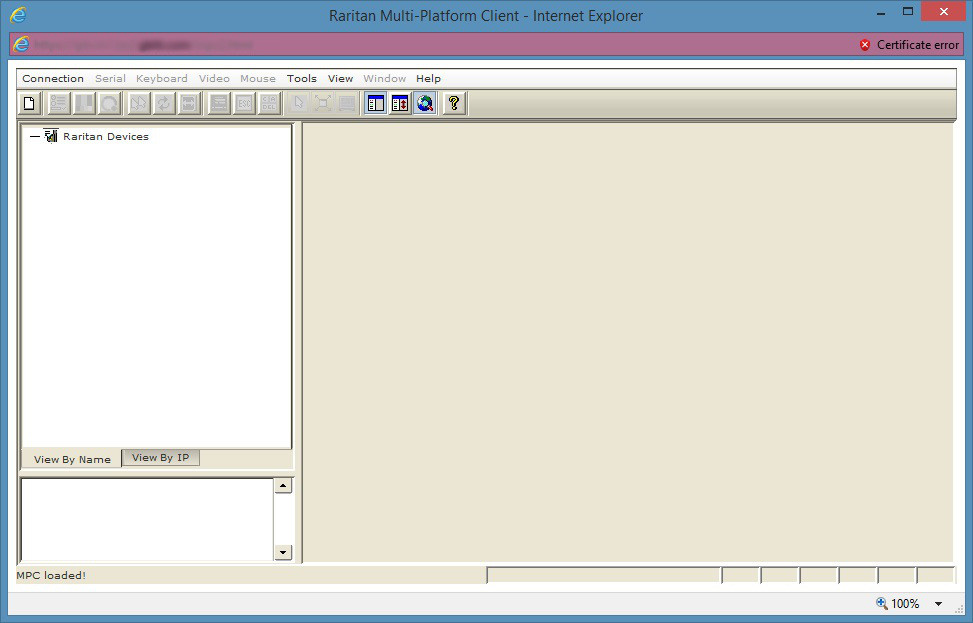
6. You will see the Client open.
*If there is already a profile for the connection, skip to step 11
7. To create a new profile, click on “Connection” and then “New Profile”

8. You will see the “Add Connection” pop-up window
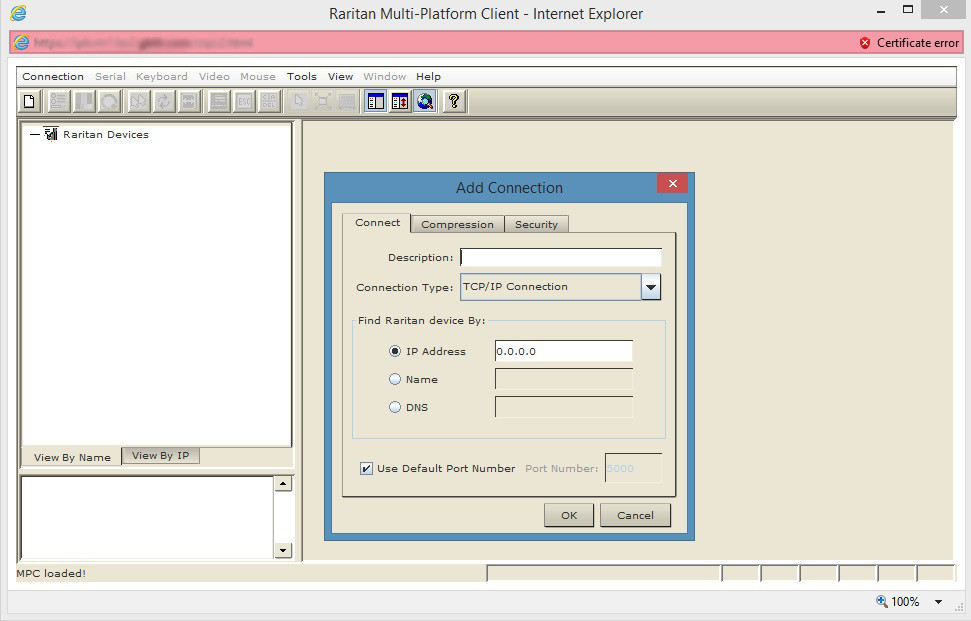
9. Enter the following information: Description: IPKVM (Or name of your choosing); IP Address: IP KVM Address provided by Global IT Support and click on “OK”
10. You will now see the newly create profile

11. Right click on the profile and click “New Connection”

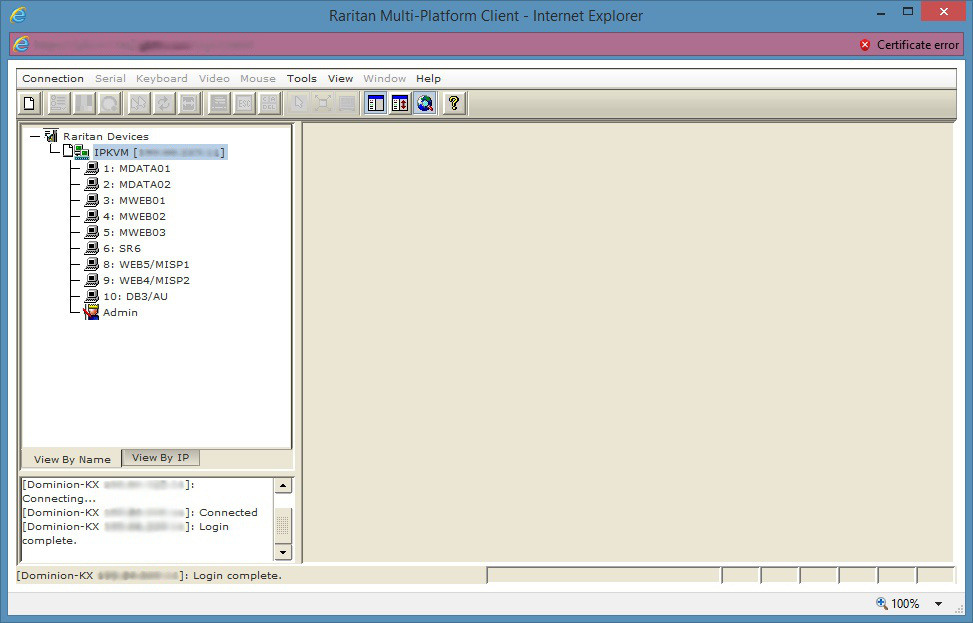
12. Enter the provided Username and Password in the “New Connection” Pop-up window and click “OK”

13. You will now see a list of connections under the profile.
14. Right click the device you wish to access and click on “New Connection”

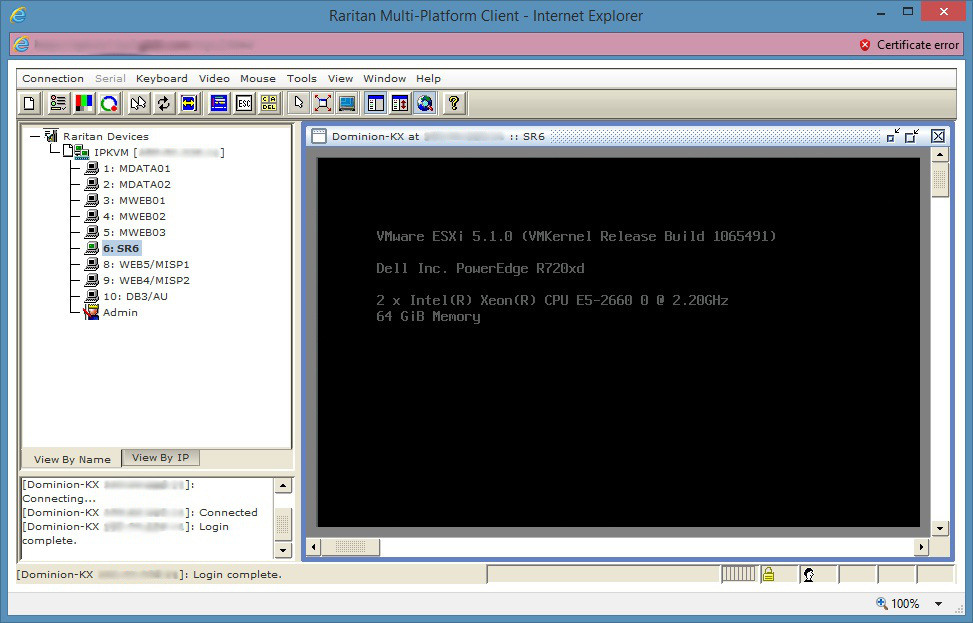
15. After the connection has been established, you will now see the display to the connected device and you will be able to interact with it using your keyboard and mouse.
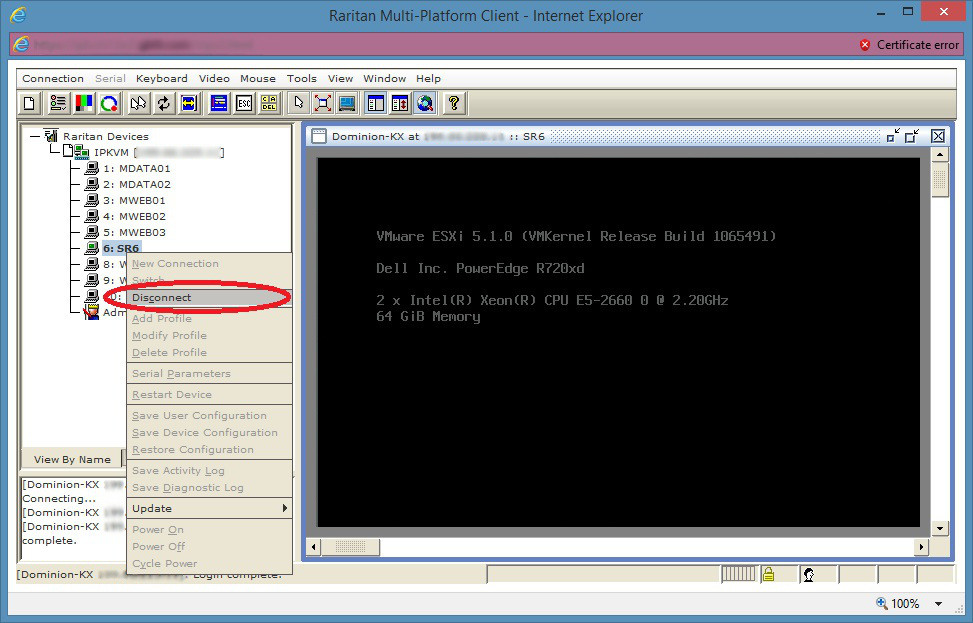
16. When you are finished accessing your device, DO NOT just close the window. This will keep the connection locked and you will not be able to access it again.
17. To close out the connection properly, right click on the selected device and click “Disconnect”
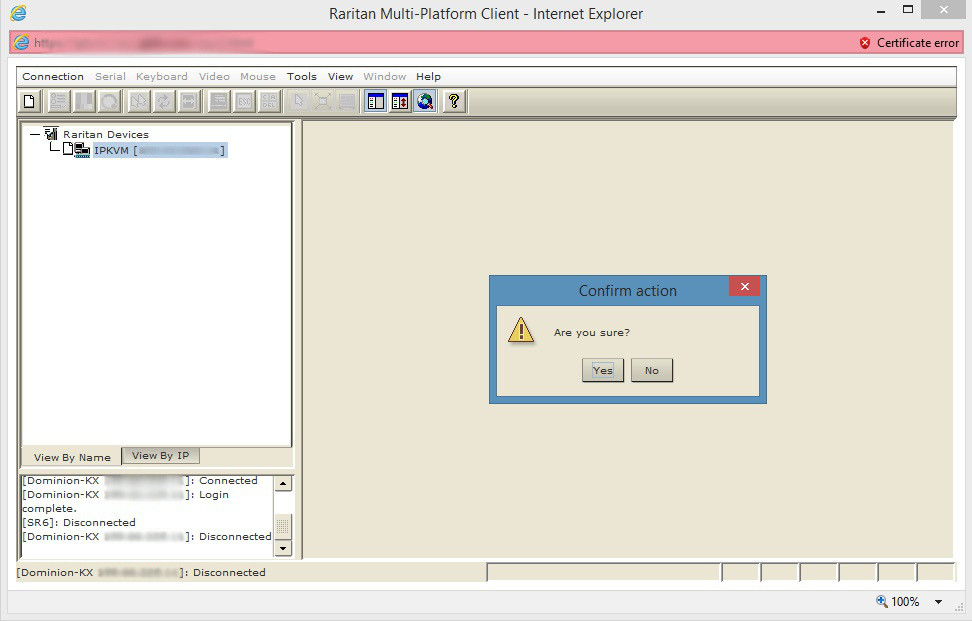
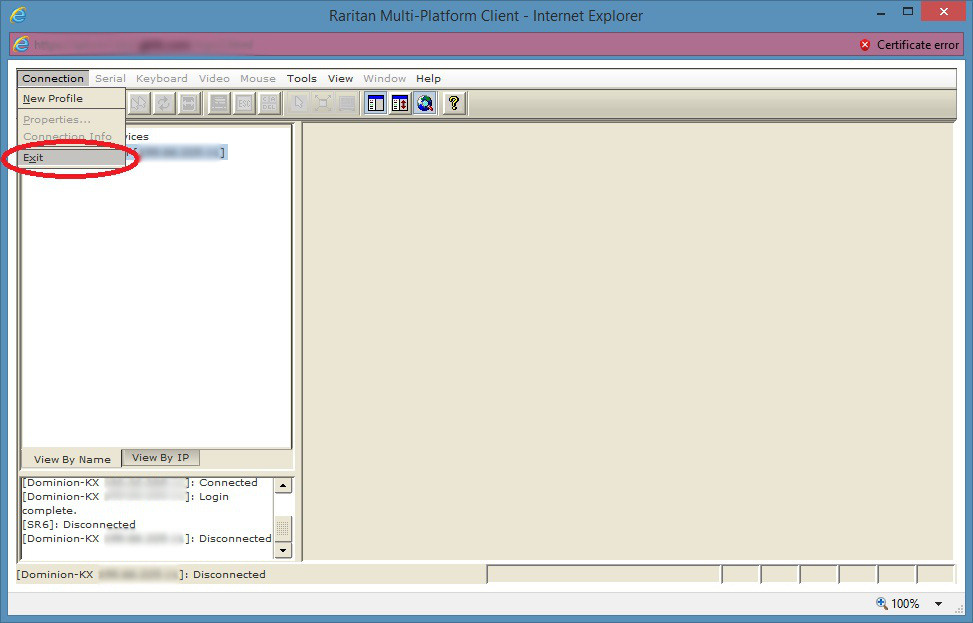
18. To terminate your session properly, right click on the profile and click “Disconnect”

19. Now close out the application by clicking on “Connection” in the top left and click on “Exit”
20. Click “Yes” on the “Confirm action” pop-up window